
Gluten-Free Pumpkin Swirl Cheesecake Bars
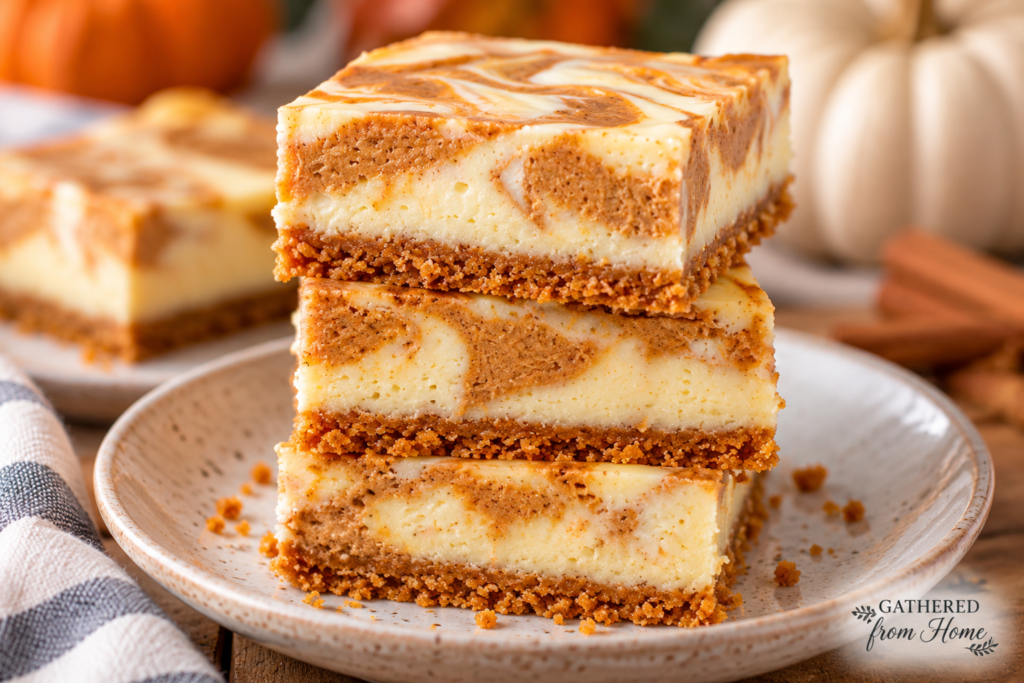
These gluten free pumpkin cheesecake bars combine a buttery gluten-free graham cracker crust with a creamy vanilla cheesecake filling and beautiful pumpkin spice swirls. Made with real pumpkin puree, cream cheese, and warm fall spices, they're a delicious make-ahead dessert for Thanksgiving, holiday gatherings, or cozy autumn weekends. Each bite has the perfect combination of rich cheesecake and spiced pumpkin flavor.
Ingredients
Gluten-Free Graham Cracker Crust
Cheesecake Filling
Pumpkin Swirl
Instructions
-
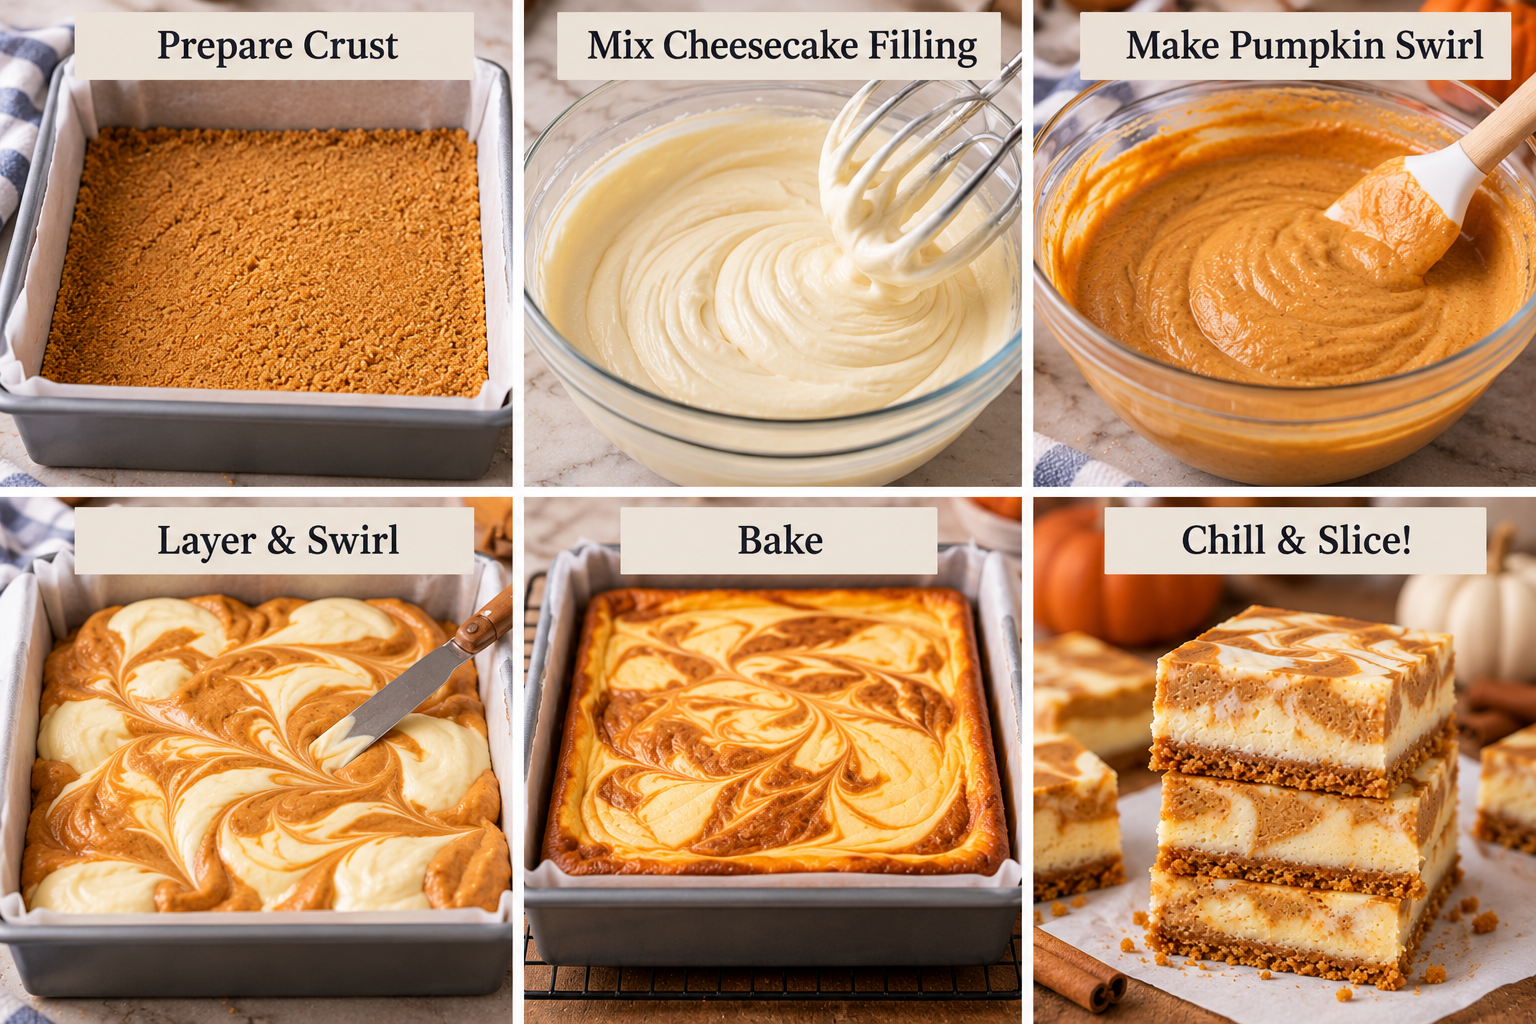
See How These gluten free pumpkin cheesecake bars Come Together
Prepare Crust → Mix Cheesecake Filling → Make Pumpkin Swirl → Layer & Swirl → Bake → Chill & Slice!
-
Preheat the Oven
Preheat your oven to 325°F.
Line an 8×8-inch baking pan with parchment paper, leaving some overhang on the sides so you can easily lift out the cheesecake bars after chilling.
-
Prepare the Gluten-Free Crust
In a medium mixing bowl, combine the gluten-free graham cracker crumbs, melted salted butter, granulated sugar, and pumpkin pie spice.
Stir until the crumbs are evenly moistened and resemble wet sand.
Press the mixture firmly and evenly into the bottom of the prepared baking pan.
-
Prebake the Crust
Bake the crust at 325°F for 8–10 minutes.
Remove from the oven and allow it to cool slightly while preparing the cheesecake filling.
Leave the oven at 325°F.
-
Make the Cheesecake Filling
In a large mixing bowl, beat the softened cream cheese and 3/4 cup granulated sugar until smooth and creamy.
Add the eggs and egg yolk one at a time, mixing on low speed just until incorporated.
Add the vanilla extract and mix gently until combined.
Avoid overmixing the batter, which can introduce excess air and cause cracking during baking.
-
Prepare the Pumpkin Swirl
In a separate bowl, combine:
- 3/4 cup pumpkin puree
- 1/4 cup granulated sugar
- 2 tsp pumpkin pie spice
- 2 tsp cornstarch
Stir until completely smooth.
Measure 1 1/4 cups of your prepared vanilla cheesecake filling and add it to the pumpkin mixture.
Fold together gently until evenly combined.
Important: The pumpkin mixture should be thick and creamy, not watery. It may be slightly softer than the vanilla filling, but it should hold its shape briefly when spooned into the pan.
-
Layer and Swirl the Cheesecake
Spoon alternating portions of vanilla cheesecake filling and pumpkin cheesecake filling over the prepared crust.
Continue alternating until both mixtures have been used.
Using a butter knife, gently drag through the batters in a figure-eight motion.
Do not drag the knife into the crust.
Avoid overmixing the two batters. We want beautiful, distinct pumpkin-orange and cream-colored swirls.
-
Bake the Cheesecake Bars
Bake at 325°F for approximately 55–70 minutes.
Begin checking around 55 minutes.
The cheesecake is ready when:
- The edges are set.
- The center has only a slight, gentle wobble.
- The center does not ripple or look liquid.
If the center is still too loose, continue baking in 5-minute increments.
An instant-read thermometer inserted into the center can provide another check; cheesecake generally sets around 150–155°F.
-
Cool the Cheesecake
Remove the pan from the oven and place it on a wire rack.
Allow the cheesecake to cool at room temperature for approximately 1 hour.
Once it has cooled, cover the pan and transfer it to the refrigerator.
-
Chill Until Firm
Refrigerate the cheesecake bars for at least 4 hours, preferably overnight.
Chilling allows the cheesecake to set fully and makes the bars easier to slice.
-
Slice and Serve
Once thoroughly chilled, lift the cheesecake out of the pan using the parchment paper.
Place it on a cutting board and slice into 12 bars.
For clean slices, use a sharp knife and wipe the blade between cuts.
Serve chilled and enjoy!
Note
Tips for Perfect Gluten Free Pumpkin Cheesecake Bars
Use room-temperature ingredients. Softened cream cheese and room-temperature eggs blend more smoothly, helping prevent lumps in the cheesecake filling.
Choose gluten-free graham crackers. Schär Honeygrams work well for the crust. Crush them into fine crumbs using a food processor or a sealed bag and rolling pin.
Use pumpkin puree, not pumpkin pie filling. Pure pumpkin gives you control over the sweetness and spices in the cheesecake.
Pumpkin pie spice makes things easier. Instead of measuring cinnamon, ginger, and nutmeg separately, use pumpkin pie spice for a balanced fall flavor.
Don't overmix the cheesecake filling. Mix the eggs on low speed just until combined. Too much air can cause the cheesecake to rise and crack.
Create gentle swirls. Drag a butter knife through the pumpkin and vanilla cheesecake mixtures a few times. Overmixing will blend the colors together instead of creating a distinct swirl.
Watch the center while baking. These gluten free pumpkin cheesecake bars may need approximately 60–70 minutes at 325°F. The edges should be set, while the center should have only a slight wobble. Oven temperatures and pan materials can affect baking time.
Chill before slicing. Refrigerate for at least 4 hours, preferably overnight. A thoroughly chilled cheesecake produces cleaner slices and a firmer texture.
Storage. Store the cheesecake bars in an airtight container in the refrigerator for up to 4 days.
Freezing. Wrap individual chilled bars tightly and freeze for up to 2 months for best quality. Thaw overnight in the refrigerator before serving.
Gluten-free reminder. Check the labels on your graham crackers, vanilla extract, pumpkin pie spice, and other packaged ingredients to ensure they're gluten-free. Avoid cross-contact during preparation.
More Recipes You'll Love
If you love cozy fall desserts, try our Creamy Pumpkin Pie Bars with Buttery Shortbread Crust for another delicious way to enjoy pumpkin season.
For another sweet treat, try our Caramel Apple Cinnamon Roll Bake, filled with warm apples flavor and finished with a sweet icing drizzle.
Helpful Baking Resource
For additional cheesecake baking tips, including how to recognize when cheesecake is properly set, visit King Arthur Baking's cheesecake baking guide.
