
Rustic No-Knead Dutch Oven Bread
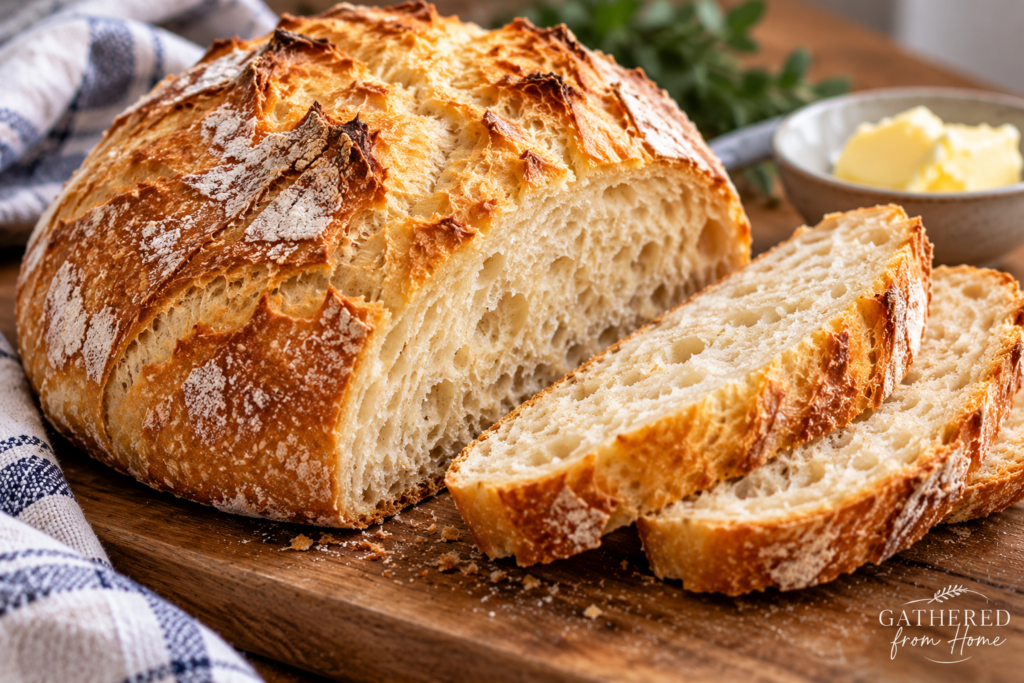
This Rustic No-Knead Bread has a beautifully crisp, golden crust and a soft, airy interior. Made with just four simple ingredients, this easy homemade bread requires no kneading and only a few minutes of hands-on preparation. Baked in a Dutch oven for that classic bakery-style crust, it's perfect alongside homemade soups, hearty stews, or served warm with butter.
Ingredients
Instructions
-
See How Rustic No-Knead Bread Comes Together
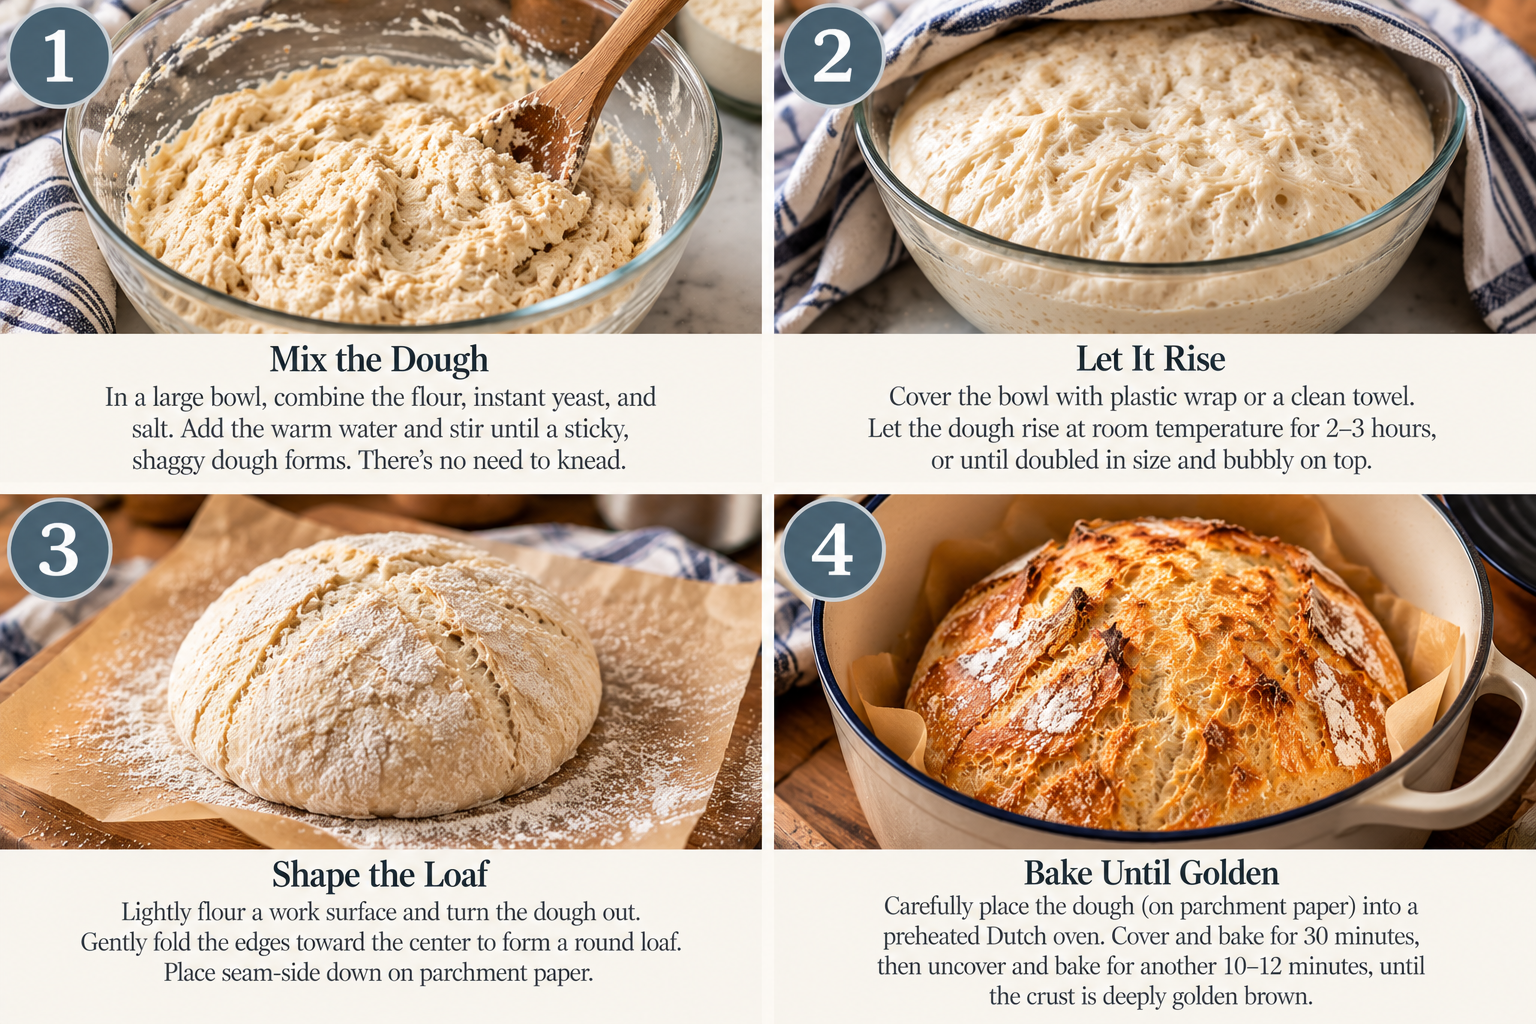
This easy homemade bread starts with a simple dough that rises until light and bubbly. After a quick shaping, it's baked in a hot Dutch oven until beautifully golden and crusty.
Mix the Dough → Let It Rise → Shape the Loaf → Bake Until Golden
-
Mix the Dough
In a large mixing bowl, combine the bread flour, instant yeast, and kosher salt.
Pour in the warm water and stir with a wooden spoon or sturdy spatula until a sticky, shaggy dough forms.
The dough should look rough and slightly wet. There's no need to knead it.
-
Let the Dough Rise
Cover the bowl with plastic wrap or a clean kitchen towel.
Let the dough rise at room temperature for 2–3 hours, or until doubled in size and bubbly on top.
-
Preheat the Dutch Oven
Place a 5–6 quart Dutch oven with its lid into the oven.
Preheat to 450°F and allow the Dutch oven to heat thoroughly.
-
Shape the Dough
Lightly flour a clean work surface and your hands.
Gently turn the risen dough onto the floured surface.
Fold the edges toward the center a few times to form a loose round loaf. Avoid kneading or pressing out too much air.
Place the dough seam-side down onto a sheet of parchment paper.
-
Bake the Bread
Carefully remove the hot Dutch oven from the oven.
Using the parchment paper, lower the dough into the Dutch oven.
Cover with the lid and bake for 30 minutes.
Remove the lid and bake for another 10–12 minutes, or until the crust is deeply golden brown.
-
Cool and Serve
Carefully remove the bread from the Dutch oven and transfer it to a wire rack.
Allow it to cool for at least 30 minutes before slicing.
Serve with salted butter, olive oil, or your favorite homemade soup.
Note
Bread Flour: Bread flour gives this loaf a chewy texture and sturdy crust. All-purpose flour may be substituted, although the texture may be slightly different.
Water Temperature: Use warm water, approximately 110°F. Avoid very hot water, which can damage the yeast.
Dutch Oven: A 5–6 quart Dutch oven works well. Make sure the pot and lid are oven-safe to 450°F.
Parchment Paper: Use parchment paper rated for high-temperature baking, or carefully transfer the dough using another oven-safe method.
Make Ahead: After the initial rise, the dough can be covered and refrigerated for up to 3 days. Allow chilled dough to rest briefly while the oven preheats before baking.
Storage: Store cooled bread in a bread bag or wrapped in a clean kitchen towel at room temperature for up to 2 days. Freeze sliced bread for longer storage.
Tips for Making the Best Rustic Bread
Don't Add Too Much Flour
The dough should be sticky and slightly shaggy. Adding too much flour can make the finished bread dense.
Give the Dough Time to Rise
Let the dough rise until it's visibly expanded and bubbly. The exact timing will depend on the temperature of your kitchen.
Preheat Your Dutch Oven
A thoroughly heated Dutch oven helps create the crisp, golden crust that makes rustic bread so delicious.
Let the Bread Cool Before Slicing
Allowing the bread to cool helps the inside finish setting. Cutting it immediately can make the center appear gummy.
What to Serve With Rustic No-Knead Bread
This crusty homemade bread is perfect for dipping into hearty soups and soaking up flavorful sauces.
Try serving it with these Gathered From Home favorites:
Slow Cooker Creamy Sausage & Tortellini Soup — A rich tomato-based soup with Italian sausage, cheese tortellini, and spinach.
Slow Cooker Lasagna Soup — A cozy, hearty dinner with all the comforting flavors of lasagna.
Farmhouse Slow Cookerhttps://gatheredfromhome.com/recipe/farmhouse-slow-cooker-chili/ Chili — A satisfying, slow-cooked chili that's especially delicious with warm homemade bread.
